Key takeaways
- The presser foot pressure dial winds or loosens the spring that holds fabric against the feed dogs, nothing more complicated than that.
- Knits, thick quilted sandwiches, and velvet all sew better with the pressure dialed down from the standard default of 3.
- Fine slippery fabrics and leather paired with a walking foot often need the dial raised instead of lowered.
- A stitch length that comes out shorter than what you dialed in on thick fabric is a sign of too much presser pressure, not a timing problem.
- Mark the factory setting before your first experiment, since most dials have no center stop to return to by feel.
Every machine carries three dials that control how a seam behaves, and sewists know exactly one of them by name. Tension gets blamed for everything, adjusted constantly, and even has its own dedicated panic when a seam looks wrong. Stitch length gets touched every time someone switches from piecing to topstitching.
Then there is the third dial, or sometimes just a small screw with a scale beside it, sitting near the top of the faceplate or above the presser bar. That one is presser foot pressure, and a large share of machine owners have never touched it. Some have never noticed it exists at all.
That is a shame, because this is the setting that decides whether two layers of fabric leave the machine flat and aligned, or with the top layer bunched into small waves nobody wanted.
What the Pressure Dial Actually Controls
The presser foot rides on a spring, and that spring is what actually holds fabric down against the feed dogs as they pull it through. Turn the pressure dial and you are winding or loosening that spring, nothing more mysterious than that.
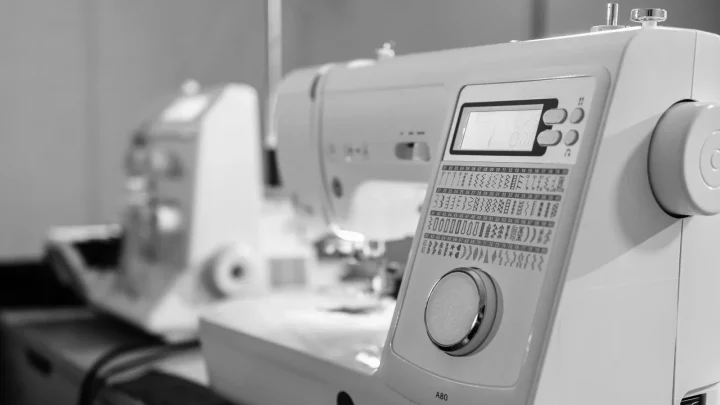
On most mechanical and semi-computerized machines the dial sits on top of the faceplate, numbered zero through six, with three set as the factory default for medium weight woven fabric. Older machines, especially models from the 1960s through the 1980s, often use a small screw above the presser bar instead, with a scale etched beside it showing light, medium, and heavy.
Either style does the same job. More pressure means more downward force clamping the fabric to the feed dogs. Less pressure means the foot floats lighter, letting fabric move with less resistance and less distortion.

When to Lower the Pressure
Knit and stretch fabrics are the most common reason to turn this dial down. Full spring pressure presses the top layer harder against the feed dogs than the layer underneath experiences, and the two layers travel at slightly different rates. The result is a top layer that ripples into small waves along the seam.
Dropping from a default of 3 down to 1 or 2 on a numbered dial usually settles a jersey or interlock knit immediately. Test on scrap first, since fabric weight varies enough that no single number works for every knit.
Thick, lofty sandwiches need the same treatment for a different reason. A quilt with cotton batting, or two layers of fleece, compress under full pressure, and that compression shortens the actual stitch length even though the dial still reads 2.5 mm. Lower the pressure and the layers pass through closer to their natural thickness.
Velvet and other pile fabrics need the lightest touch of all. Full pressure crushes the pile under the foot and leaves a visible flattened track along the seam that no amount of steaming fully lifts back out. Drop to 1 and consider a walking foot as well.
When to Raise the Pressure
Fine, slippery fabrics such as silk charmeuse or a slick polyester lining sometimes need more pressure, not less. With too little grip the fabric can wander sideways under the foot, or the feed dogs can slip against it without pulling it through cleanly.
Raise the dial a notch or two above the default of 3 and watch whether the fabric tracks straighter. This is the one case where more pressure solves a control problem rather than causing one.
Leather and vinyl call for higher pressure as well, but only when paired with the right foot. A walking foot or a roller foot feeds both layers evenly at higher pressure without the sticking a standard foot causes on these materials.
Reading the Symptoms Correctly
Three symptoms point straight back to this dial, and knowing which is which saves a lot of guessing.
- The top layer creeps ahead of the bottom layer and puckers or waves: pressure is too high for this fabric.
- Fabric wanders left or right, or the feed dogs seem to slip without pulling it through: pressure is too low.
- Actual stitch length comes out shorter than the number dialed in, especially on thick fabric: pressure is too high and compressing the sandwich.
Match the symptom to the fix before touching anything else on the machine. A tension adjustment will not fix fabric creep caused by pressure, and a lot of sewists chase the wrong dial for an hour before finding the right one.
Machines Without a Manual Dial
Many computerized machines from the last fifteen years set presser pressure automatically, sensing fabric thickness and adjusting spring force without a dial at all. These machines handle most fabric changes well on their own, though some models still offer a menu setting to bias the automatic pressure up or down for unusual materials.
Budget machines sit at the other end. Many entry level models use a single fixed spring with no adjustment whatsoever. If your machine has no dial, no screw, and no menu setting for pressure, that is likely the reason, and a walking foot becomes the main tool for handling knits and thick sandwiches instead.
Testing a New Setting Before You Commit
Cut two 10 inch strips of the actual fabric and layer them the way the finished seam will sit, batting included if that applies. Sew a straight seam down the middle at your intended stitch length, then lay the piece flat and measure how far the top layer has crept relative to the bottom.
Anything more than an eighth of an inch of creep over 10 inches is worth correcting with a pressure adjustment before cutting into the real project. Adjust one number at a time and resew the test rather than jumping two or three settings at once.
Before you turn anything
Mark the factory position with a small dot of nail polish or a strip of tape before your first experiment. Most dials have no true center stop, so this is the only way back to exactly where the machine started.

The Reset Rule
Set the pressure back to default the moment a special project is finished. It is a fast setting to forget, and the next project, often an ordinary cotton seam weeks later, ends up sewn at whatever extreme number the velvet job needed.
Taping a small note near the dial that reads reset after this project solves the problem for good. It costs nothing, and it is the single habit that prevents the most common pressure related complaint on the bench.
Machines come in for service with the pressure dial sitting at 0 or 6, the two extremes, far more often than at any number in between. In almost every case the owner had no idea the dial existed, let alone that a knee, an elbow, or a curious pass while cleaning had knocked it there. Check this dial anytime a machine that used to sew well suddenly does not.
If you are weighing a repair against a replacement, Sewing Machine Tension: How It Really Works helps.
Frequently asked questions
What number should presser foot pressure be set to normally?
Most numbered dials default to 3 out of a 0 to 6 range, and that setting is calibrated for medium weight woven cotton at the factory. Treat 3 as your home base and move away from it only for a specific fabric, then return afterward.
Why does my knit fabric ripple when I sew a seam?
Rippling on knits almost always means the presser pressure is pressing the top layer against the feed dogs harder than the layer underneath can match, so the two layers travel at different rates. Lower the dial from the default of 3 down to 1 or 2 and test again on a scrap of the same fabric.
My machine has no presser pressure dial. Is something missing?
Not necessarily. Many computerized machines set pressure automatically based on fabric thickness, and many budget machines use a single fixed spring with no adjustment at all. If you cannot find a dial, a screw, or a menu setting after checking your manual, a walking foot is the better tool for difficult fabrics on that model.
How much fabric creep is normal on a test seam?
On a 10 inch test seam, less than an eighth of an inch of difference between the top and bottom layer is generally fine. Anything beyond that is worth correcting with a one notch pressure adjustment before you cut into the actual project.
Can wrong presser foot pressure damage my machine?
It will not damage the machine itself, but running heavy pressure on thick sandwiches for months can stress the presser bar spring and wear the feed dogs unevenly over years of use. The more immediate cost is wasted fabric and time spent troubleshooting a seam problem that a single dial would have solved.

Amit Sisodia
Amit Sisodia is a longtime sewing enthusiast and hobbyist repair tinkerer who has spent years diagnosing tension quirks, jammed bobbins, and stubborn feed dogs across everything from vintage treadle Singers to modern computerized machines. He writes practical, tested guides for BobbinWise so home sewists can spot problems early, tackle safe repairs themselves, and know when it's smarter to call in a technician.