Key takeaways
- Take your foot off the pedal the instant a jam starts, because extra power only tightens the wad.
- Raise the presser foot, rock the handwheel toward you a few degrees, and snip the top thread before moving the fabric.
- Cut the wad free with the blade tip pointed away from the hook race, and never yank it out.
- Short thread tails, a missed take-up lever, packed lint, and struck pins cause almost every jam.
- A jam freed gently almost never damages anything, so clean the race, rethread fully, and test on scrap.
Pedal down, seam halfway finished, and the sound changes. The hum drops into a growl, the needle freezes mid stroke, and the fabric locks to the plate like it has been glued there.
Take your foot off the pedal. That is the entire first step, and it matters more than anything else on this page. Every extra second of power wraps thread tighter around parts that were never built to hold it.
Now the reassuring part: a jam looks like a catastrophe and almost never is one. Freed gently, the machine under all that thread is usually untouched, and you can be sewing again inside ten minutes.
Cut the Power Before You Touch Anything
With your foot off the pedal, unplug the machine from the wall. Not just switched off: unplugged. You are about to put fingers and a blade next to the needle, and one accidental nudge of the pedal is how needles end up through fingertips.
If your machine has a needle up and down button, leave it alone for now. Buttons fire the motor, and the motor is exactly what this situation does not need.
Skip the temptation to tap the pedal one more time to see if the machine clears itself. It will not, and every attempt drags the tangle deeper into the works.
Never power through a jam
Running the pedal against a jam can bend the needle, drive it into the plate, or slam the thread wad through the hook race hard enough to knock the machine out of time. Hook and timing repairs run $60-150 at a shop, and nearly every one starts with a pedal pressed in frustration.
Free the Fabric in Five Gentle Moves
The goal is to take tension off the thread before you move the fabric at all. Work the order exactly, because each step releases the next.
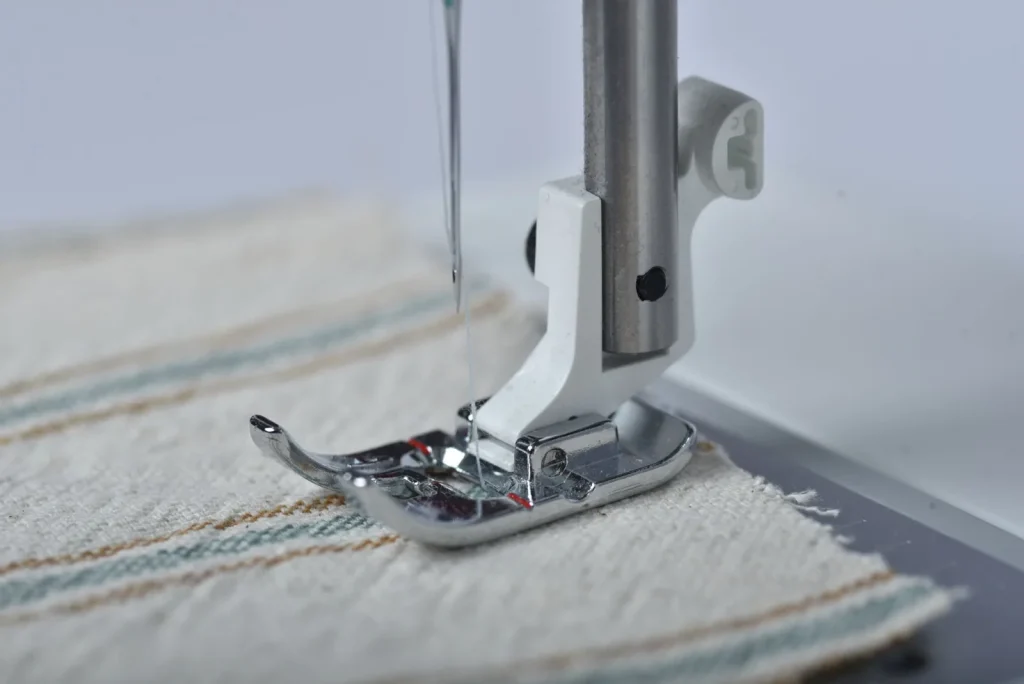
- Raise the presser foot with its lifter. This opens the tension discs and releases the machine’s grip on the fabric.
- Rock the handwheel gently toward you, a few degrees back and forth. You are letting the take-up lever feed slack into the top thread, and you will often feel the fabric loosen immediately.
- Snip the top thread close to the fabric surface with small sharp scissors.
- Lift the fabric slowly up and back to expose the underside. If it resists, stop, rock the handwheel a few more degrees, and try again. Lifting is fine; yanking never is.
- Cut the exposed thread wad free a strand or two at a time, using scissor tips or a seam ripper with the point aimed away from the hook race.
That last detail saves more machines than any other. A wad ripped out by force can spring the bobbin case out of position or bend the hook tip, and either mistake turns a free fix into that $60-150 repair.
The full sequence reads long but takes under two minutes at the machine. It beats the fastest yank by a week of waiting at a repair counter.
What Was Actually Happening Under the Plate
Nearly every jam is a thread wad, often called a bird nest, ballooning in the cavity around the hook race. The race is the circular track where the hook spins, catching the top thread and wrapping it around the bobbin thread hundreds of times a minute.
When the top thread loses tension, the hook keeps catching loops it can no longer pull tight. Three or four revolutions later, a knot the size of a pea is wedged into the works and the motor stalls.
Sewists usually blame the bobbin because the mess appears underneath. Nine times out of ten the wad is top thread that lost tension above, which is why the fix always ends with a complete top rethread.
This is also why gentle beats strong. You are not fighting broken gears; you are easing a knot off a precisely shaped, easily scratched hook.
The Cleanup That Prevents Jam Number Two
Once the fabric is free, resist the urge to rethread and carry on. Repeat jams usually happen because a few strands of the old wad stayed behind.
Remove the needle plate. On most machines that means loosening two small screws; many Brother and Janome models use a slide latch instead. Lift out the bobbin, and on front loading machines, the bobbin case too.
Brush the race clean with the stiff little brush from the accessory kit. Hunt for fragments wedged under the feed dogs and behind the hook, because a single leftover strand can seed the next nest within one seam.
Run a fingertip around the bobbin case rim and feel for nicks or burrs. A rough spot that catches skin will catch thread too. A shop can polish minor damage, and a replacement case for most household machines costs $10-25.
If your manual calls for oil, this is the moment: one drop of clear sewing machine oil in the race, then a few slow handwheel turns to spread it. Skip oil entirely on machines the manual describes as self lubricating.
Finish with a fresh needle even if the old one looks straight, because jams bend needles by fractions of a millimeter. Then rethread from zero: spool to needle with the presser foot up, bobbin reinserted so the thread pulls in the direction your manual shows.
- Every strand of the wad cleared from the race
- Needle plate off, feed dogs and race brushed clean
- Bobbin case rim checked for nicks and reseated
- Fresh needle in the correct size for the fabric
- Complete rethread, top and bobbin, presser foot up
- Slow test seam on scrap before the real project
The Four Causes Behind Almost Every Jam
Jams feel random, but four causes account for nearly all of them. Run through the list in order whenever a machine jams twice in one session.
Thread tails cut too short
Tails under 10 cm get dragged down through the plate on the first stitch and seed a nest instantly. Leave 10-15 cm of thread and hold both tails lightly behind the foot for the first 3-4 stitches.
Top thread missing the take-up lever
Miss the take-up lever during threading and nothing manages slack, so the hook builds a nest before the seam is 5 cm long. Thread with the presser foot up and the needle at its highest point, and the lever sits right in the path where you cannot skip it.
Lint packed into the race
Fleece, flannel, and toweling shed felt that packs the race solid. Brush it out every 2-3 bobbin changes on fluffy fabrics and every 8-10 sewing hours on everything else.
Sewing over a pin
A needle that clips a pin can chip its tip, snap, or shove pin and fabric down into the plate together. Pull pins before they reach the foot, or switch to sewing clips for hems and thick seams.
Six Minutes on a Jeans Hem
The jam I describe to every nervous beginner happened on a plain jeans hem: four layers of denim, a 90/14 needle, and a dead stop 3 cm from the end of the seam.
Foot off, plug pulled, presser foot up. The handwheel rocked back about the width of two clock minutes and the denim relaxed its grip. One snip at the top thread and the hem lifted to reveal a nest the size of a chickpea.
The plate came off with two screws. Six strands got cut one at a time, blade tip always aimed at the open front of the machine, then a brush through the race, a new needle, and a complete rethread.
Total time from growl to finished hem: six minutes. Nothing was pulled, nothing was pried, and the pedal stayed untouched until the machine was closed up and threaded again.
Denim forgives, which makes it good practice material. The same calm sequence works on chiffon; it simply asks for smaller scissors and better light.
Trust the Machine Again, but Verify First
Before returning to your project, sew 20-30 slow stitches on a folded scrap of the same fabric. Watch the stitch form, listen for ticking, and flip the scrap to check for loops underneath. Clean stitches on both sides mean the jam is history.
If the scrap jams again, repeat the cleanup with a phone flashlight aimed into the race. One translucent strand hiding against pale plastic causes most repeat performances, and a third jam in a row is your cue to book a technician, because hook timing is not a kitchen table fix.
Keep the bigger lesson. A jam is a knot, not a breakage, and a machine freed gently, cleaned out, and rethreaded from scratch comes back every single time.
Before you spend anything, it is worth reading Machine Eating Fabric? Stop the Needle Plate Black Hole.
This pairs naturally with Wavy Seams on Stretch Fabric: Get Hems to Lie Flat for a fuller picture.
Frequently asked questions
Can a jam actually break my sewing machine?
Rarely, if you free it gently. The damage happens when fabric gets yanked or the pedal gets forced, which can bend the hook or shift the bobbin case and lead to a $60-150 shop repair. Rock the handwheel, cut the thread, and lift the fabric out slowly and the machine will almost always be fine.
Why does my machine jam at the start of every seam?
Your thread tails are probably too short. Leave 10-15 cm of top and bobbin thread behind the foot and hold both lightly for the first 3-4 stitches. Starting the seam about 5 mm in from the fabric edge instead of right on it also helps the first stitch form cleanly.
Do I need to oil my machine after clearing a jam?
Only if your manual calls for it. Many front loading machines take one drop of sewing machine oil in the hook race after cleaning, while most modern top loading machines are designed to run dry. Never substitute cooking oil or all purpose household oil, which gum up the race.
What if the handwheel will not move at all?
Stop forcing it and remove the needle plate so you can see the wad. Cut the visible strands piece by piece with the tip pointed away from the hook, and the wheel usually frees up within a few snips. If it stays locked with the race empty, thread may have wound behind the hook, and that is a technician job.
Should I replace the needle after every jam?
Yes. A jam can bend the tip a fraction of a millimeter or raise a burr you cannot see, and either one causes skipped stitches and snagged fabric later. At $1-2 per needle it is the cheapest insurance in sewing.

Amit Sisodia
Amit Sisodia is a longtime sewing enthusiast and hobbyist repair tinkerer who has spent years diagnosing tension quirks, jammed bobbins, and stubborn feed dogs across everything from vintage treadle Singers to modern computerized machines. He writes practical, tested guides for BobbinWise so home sewists can spot problems early, tackle safe repairs themselves, and know when it's smarter to call in a technician.