Key takeaways
- A hump jumper costs about 5 to 12 dollars, and folded cardboard does the same job for free.
- A 100/16 or 110/18 jeans needle punches through six to eight layers where a universal needle flexes and snaps.
- A hammer or clapper compresses cotton denim 30 to 40 percent, shrinking the bump before the needle ever meets it.
- Hand turning the wheel through two or three stitches at the peak beats fighting the pedal every time.
- Stitches that stretch out right at a seam junction are the signature of a tilted foot and a stalled feed.
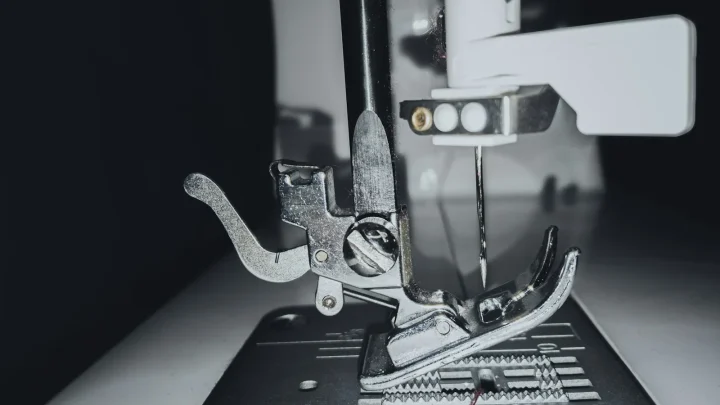
The presser foot hits the seam junction at the side of a jeans hem and tips backward, front toes lifting into the air like a car stuck nose up on a curb. The needle keeps swinging, but with the foot tilted, the fabric underneath stops moving.
Two or three stitches pile on top of each other in the same spot, then the needle either skips clean over the stall or buries itself into the needle plate and snaps. A walking foot slows the problem down, but even that climb stalls the feed for a beat.
Six to eight layers of denim stacked at a side seam is a lot to ask of a needle built for two layers of fabric, and it happens on almost every pair of jeans, at almost the exact same spot. The fix is not a stronger machine. It is a shim, a needle swap, and a few seconds of turning the wheel by hand at the peak of the climb.
Why the Foot Tilts and the Feed Stops
A presser foot is built to ride flat across one or two layers of fabric, toes and heel touching down at the same height. A side seam folded into a hem stacks four layers of denim from the seam allowance on top of two more from the hem itself, six to eight layers in the span of an inch.
When the foot meets that stack, the front toes climb first and the heel lags behind, so the whole foot tips backward. A tilted foot only presses down at one point instead of across its full length, and the fabric under the unsupported half stops feeding.
The needle does not know the fabric stopped. It keeps swinging at the same speed, so it either skips clean over stitches that never advanced, or comes down off center into fabric that shifted under the tilt, flexes sideways, and cracks against the needle plate.
The Hump Jumper and Its Free Substitute
A hump jumper, also sold as a height compensating tool, is a small plastic shim shaped like a horseshoe, usually 5 to 12 dollars for a set of three thicknesses. It slides under the presser foot to level it out at the exact height of the bump.
Going up the hill
Place the shim behind the needle, under the raised heel of the foot, so the sole sits level instead of tipping backward. Sew until the foot clears the peak and the shim falls away on its own.
Coming down the other side
Once the needle is past the peak, move the shim in front of the needle instead, leveling the toes as they meet the drop. Skipping this second placement is why a bump that sewed cleanly going up still stalls on the way down.
A stack of folded cardboard from a cereal box works identically and costs nothing. Cut two or three layers about an inch square and slide the stack behind or in front of the foot exactly like the plastic version. Denim shops that see this problem daily often keep a tin of pre-cut cardboard shims by the machine for exactly this reason.

Walking Feet, Hand Wheels, and Patience at the Peak
A walking foot adds its own set of feed dogs on top of the fabric, gripping from above at the same time the machine’s regular feed dogs grip from below. That top grip keeps feeding through a bump that would stall a standard foot, and it is worth the swap for anyone hemming more than a pair or two of jeans a year.
Even with a walking foot, the two or three stitches at the very peak of the stack go better by hand. Take your foot off the pedal, turn the handwheel toward you, and walk the needle through those stitches one at a time. Watch the foot as it crosses the peak and stop the moment it looks like it wants to climb.
Hand walking feels slow, but it takes about ten seconds per bump, and a pair of jeans only has two of them at the side seams. That is a small trade for a needle that survives the whole hem.
Needle Size and Stitch Length for the Climb
A fine needle flexes rather than punching cleanly through eight layers of denim, and a flexed needle is a needle that hits the plate. Switch to a 100/16 jeans needle for most hems, or 110/18 on heavyweight raw denim, before the machine ever meets the bump.
Jeans needles carry a stronger shaft and a slightly rounded, reinforced point built to punch through woven layers without deflecting sideways. A universal needle in the same size bends more and breaks more often on the same stack.
Unplug the machine before you make the swap. A stray bump of the pedal with your fingers at the needle clamp is how an easy needle change turns into a repair of its own.
Lengthen the stitch to 3 to 3.5 millimeters for the few stitches that cross the bump, then return to the normal length once the foot is back on flat fabric. A longer stitch gives the needle fewer chances to hit the exact same weak spot twice.
| Layer count | Needle size | Stitch length | Foot help |
|---|---|---|---|
| 2 to 3 layers | 90/14 universal | 2.5 mm | Standard foot |
| 4 to 5 layers | 100/16 jeans | 3 mm | Shim or walking foot |
| 6 to 8 layers | 100/16 to 110/18 jeans | 3 to 3.5 mm | Shim plus hand walking |
Flattening the Bump Before You Sew
The easiest bump to cross is the one that is not as thick to begin with. Before the hem goes anywhere near the needle, pound the seam junction with a tailor’s clapper or a regular hammer over a hard surface, six or eight solid taps.
Cotton denim compresses 30 to 40 percent under that kind of pressure, mostly by driving the air out of the weave and flattening the seam allowances inside. A junction that measures a quarter inch thick off the iron often measures noticeably less after a few taps and a press with steam.
Trimming helps too. Open the side seam for about an inch above and below the hemline and trim the allowance down to a quarter inch, or grade the layers to different widths so they do not all stack at the same height. On garments built from scratch, sewing the side seam as a flat felled seam avoids the worst of the stack before it ever reaches the hem, since a flat felled seam folds its raw edges into the seam itself instead of adding them on top at the hem allowance.

A Broken Needle and the Marks It Leaves Behind
A customer came in last month with a pair of jeans and a small bag holding the pieces of a needle that had broken mid hem. She had felt the machine stall, heard the crack, and stopped right away, which was exactly the right instinct.
The hem told the rest of the story before I even asked. Right at the side seam, the fabric carried a pressed ridge where the tilted foot had crushed down on one edge while the other lifted clear, and the stitches on either side of the junction were noticeably longer than the rest of the hem, stretched out where the feed had stalled.
Those tilt marks are as diagnostic as an x-ray. Whenever a repair comes in with stitches that lengthen and then vanish for a stretch right at a seam intersection, the story is the same every time: a tilted foot, a stalled feed, and a needle that had nowhere left to flex.
The Jeans Hem Sequence, Start to Finish
Work the bump with a routine instead of hoping this pair goes better than the last one.
- Swap in a 100/16 or 110/18 jeans needle before you start.
- Pound the seam junction flat with a hammer or clapper, six to eight taps.
- Trim or grade the seam allowance inside the hem wherever you can reach it.
- Lengthen the stitch to 3 to 3.5 millimeters as you approach the bump.
- Slide a hump jumper or folded cardboard behind the foot going up.
- Hand walk the two or three stitches right at the peak with the handwheel.
- Move the shim in front of the foot for the way down.
- Return to the normal stitch length once the foot is back on flat fabric.
One Bump at a Time
None of this takes special skill, only a small kit and the patience to slow down for ten seconds twice per hem. Keep a hump jumper or a square of folded cardboard, a pack of 100/16 jeans needles, and a clapper within reach of the machine, and the bump stops being a surprise.
Test the sequence on a scrap seam junction cut from an old pair of jeans before committing to the good pair. Once a stack of eight layers crosses clean without a skipped stitch or a stall, every future hem gets faster instead of scarier.
The machine was never underpowered for the job. It just needed a level foot and a needle built for the climb.
Frequently asked questions
What is a hump jumper and do I really need one?
A hump jumper is a small plastic shim, 5 to 12 dollars for a set, that levels the presser foot when it climbs a thick seam junction. A stack of folded cardboard works the same way for free, so the tool itself is optional, but leveling the foot is not.
Why does my needle keep breaking at the jeans hem?
The needle is flexing sideways as it enters a stack of six to eight layers under a tilted foot, and it eventually hits the needle plate. Switch to a 100/16 or 110/18 jeans needle and level the foot with a shim before the needle reaches the bump.
Can I just push the fabric through the thick spot by hand?
Pushing from behind fights the feed dogs and often makes the stall worse. Instead, turn the handwheel by hand for the two or three stitches at the peak, which walks the needle through without forcing the fabric.
Does pounding the seam with a hammer actually make a difference?
Yes. A few solid taps with a hammer or clapper compress cotton denim 30 to 40 percent by driving air out of the weave, so the bump the needle has to cross is measurably thinner.
Do I need a walking foot for jeans hems?
Not for an occasional pair, but if denim hems come up often, a walking foot grips fabric from above and below at once, which carries it through thick spots that stall a standard foot.

Amit Sisodia
Amit Sisodia is a longtime sewing enthusiast and hobbyist repair tinkerer who has spent years diagnosing tension quirks, jammed bobbins, and stubborn feed dogs across everything from vintage treadle Singers to modern computerized machines. He writes practical, tested guides for BobbinWise so home sewists can spot problems early, tackle safe repairs themselves, and know when it's smarter to call in a technician.