Key takeaways
- Feed dogs grip only the bottom layer, so the top rides on friction alone and slowly falls behind.
- A 1 percent creep between layers adds up to half an inch of offset over a 50 inch seam.
- Perpendicular pins set every 2 inches hold shifty pairs far better than pins placed parallel to the seam.
- A walking foot costs $15-90 and drives both layers at the same rate as the feed dogs below.
- Stay stitch a bias edge before you join it to anything, because bias stretches rather than creeps.
The two edges started even. You pinned the plaid flannel front to the yoke, matched the checks at the shoulder seam, and fed the whole stack under the foot at a steady pace. Twenty inches later you reach the end, and the edges that lined up perfectly at the pins now sit half an inch out of true.
Nothing about your technique felt wrong while it happened. The needle went up and down at the same rhythm the whole way. Somewhere inside that rhythm, one layer of fabric quietly outpaced the other, stitch by stitch, until the gap became impossible to ignore.
This is not a tension problem, and it is not a timing fault inside the machine. It is a feeding problem, and it has a short list of causes and an even shorter list of fixes, some free and some worth a small tool purchase.
Why the Bottom Layer Always Wins
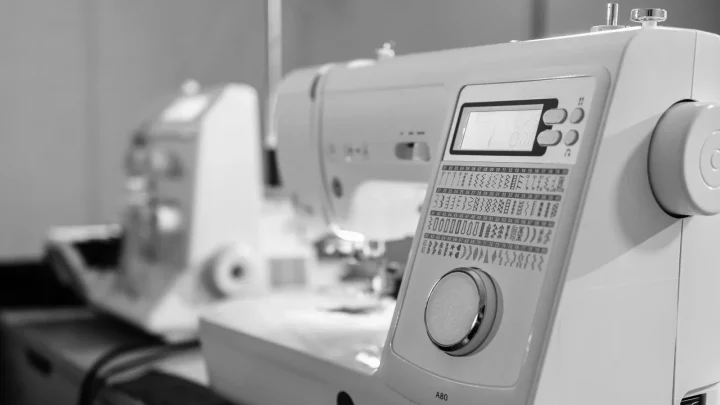
Look underneath the needle plate and you will find the feed dogs, a set of metal teeth that rise, grip the bottom layer of fabric, pull it back a set distance, then drop and reset for the next stitch. That motion is the only active feeding force most machines have.
The presser foot above does not pull anything. It only presses down, holding the fabric stack against the feed dogs so the teeth can grip. The top layer moves because friction against the layer below drags it along, not because anything is actively feeding it.
Friction is never perfect. Smooth or slippery fabrics, a heavier top layer, or extra batting between the pair all reduce that drag, so the top layer arrives at the needle a fraction of a stitch late, over and over.
One percent of creep sounds trivial until you multiply it out. On a 50 inch seam, a 1 percent gap between layers equals half an inch of offset by the last stitch, exactly the kind of drift that ruins a plaid match or leaves a zipper opening puckered.
Tip
When one fabric in the pair is clearly the troublemaker, satin against wool crepe, chiffon against cotton, sew with the shifty layer face down against the feed dogs. The teeth grip it directly instead of relying on the calmer fabric to drag it along by friction, and creep drops noticeably before you change a single setting.
Pin Perpendicular, Pin Closer Together
Pins placed parallel to the seam, running in the same direction as your stitching, let both layers pivot slightly around each pin as they feed. It does not stay put there, it just slows down.
Turn every pin perpendicular to the seam line instead, crossing the stitching line at a right angle. The pin now blocks the layers from sliding past each other in the direction that matters, and you can sew right up to it and pull it free just before the needle arrives.
Spacing matters as much as direction. A stable quilting cotton tolerates pins every 4-6 inches. Shifty fabric, silky rayon, a plaid you need to keep matched, minky, tightens that to every 2 inches.
Baste the Pairs That Won’t Behave
Some pairings shrug off pins. Silk charmeuse against silk charmeuse, velvet against anything, two bias edges meeting at a point, these move under the presser foot no matter how many pins you cram in.
Hand baste those seams before they ever reach the machine. Use a contrasting thread and stitches about 3/8 inch long, and run the basting exactly on the seam line so your machine stitching can follow it and pull free afterward without a trace.
Basting takes 5-10 minutes on an average seam, far less than unpicking a velvet cuff that crept an inch and puckered on the way.
Ease the Presser Foot Off the Top Layer
Presser foot pressure is the force squeezing the whole stack against the feed dogs, and most machines let you dial it down. On machines with a numbered pressure dial, commonly 0-9, dropping two or three numbers from your everyday setting reduces the grip on the top layer without letting the fabric wander sideways.
Less pressure means less friction drag holding the top layer captive to the bottom, which sounds backward until you remember that the top layer already moves passively. A lighter touch lets it settle into place evenly instead of being clamped in a position it then has to catch up from.
Test on a scrap first. Too little pressure lets the top layer wander sideways instead of just lagging.
Built In Dual Feed: Let the Machine Match Itself
Some machines solve this at the hardware level. Pfaff calls its version IDT, Integrated Dual Feed, a set of feed teeth built into the machine above the needle plate that drop down and mesh with a matching arm on the presser foot shank. Janome’s AcuFeed system does the same job with a removable foot and feed arm.
Engage either system with a lever or a snap on attachment, no tools needed, and the top layer gets its own set of teeth moving at exactly the rate of the teeth below. Creep does not get reduced. It gets eliminated, because both layers are now actively driven instead of one riding on friction.
The Walking Foot: Buy Once, Stop Fighting It
No built in dual feed? A walking foot does the same job as a snap on attachment. Underneath its wider shoe sits a second set of feed teeth, linked by a small arm to the needle bar, that rise and fall in time with the feed dogs below.
Both layers get gripped and pulled at the same rate for the entire length of the seam. A generic walking foot runs $15-40 and fits most low shank machines. Branded versions from Bernina, Juki, and Baby Lock run $40-90 and glide with less noise.

For the Truly Evil Pairs
Velvet on satin is the fabric world’s worst feeding match. Both surfaces are slippery, velvet has a pile that shifts under pressure, and even a walking foot sometimes cannot fully tame the pair on a long seam.
Temporary spray adhesive, sold as basting spray for about $10-14 a can, tacks the layers together just enough to stop independent movement while leaving no permanent bond. Spray one layer lightly, wait 30 seconds for it to turn tacky, then smooth the second layer on top.
Wash away basting tape works the same way without the overspray. A strip runs $6-10 a roll, sits directly on the seam line, and dissolves completely in a warm rinse once the seam is sewn. Either method buys you a seam that behaves like one solid piece of fabric until you choose to separate it again.
Match the Fabric to the Technique
Not every fabric pair needs the full toolbox. Minky and fleece creep worse than almost anything else in a sewing room because their pile compresses unevenly under the foot. Treat them like the velvet and satin pairing above, with pins every 2 inches at minimum and a walking foot if you own one.
Bias cut seams behave differently from everything discussed so far. Cut on the true bias, fabric does not creep the way straight grain fabric does. It stretches, because the diagonal weave has almost no resistance to pulling.
Stay stitch each bias edge, a line of straight stitching about 1/8 inch inside the seam allowance at a 2 mm stitch length, before you sew it to anything else. That line locks the grain in place so the edge holds its shape instead of growing longer under the presser foot.
| Fabric pair | Main problem | Best technique |
|---|---|---|
| Quilting cotton, three layer sandwich | Mild creep across a long seam | Walking foot as standard equipment |
| Plaid flannel or matched stripes | Pattern drifting out of alignment | Perpendicular pins every 2 inches, hand baste if matching is critical |
| Silk charmeuse or rayon challis | Slippery layers sliding independently | Hand basting, shifty layer face down |
| Minky or fleece | Heavy creep from pile and thickness | Pins every 2 inches plus a walking foot |
| Velvet on satin | Both layers slide, pile shifts | Spray baste or wash away tape, then a walking foot |
| Bias cut edges | Stretching, not creeping | Stay stitch before joining |
I keep a flannel shirt in mind every time a customer describes this problem, because I made the same mistake myself years ago. The shirt was a wide green and black check, cut with the fronts on straight grain.
I pinned it the way I pinned everything back then, parallel to the seam instead of across it. Pressed open after that first pass, the check had crept a full pattern repeat out of alignment by the hem, plainly visible from three feet away.
I unpicked the seam and recut the front from a fresh piece of flannel.
The second attempt used perpendicular pins every 2 inches with the shifty layer face down, and it matched at the shoulder, the side seam, and the hem. That afternoon taught me to respect plaid the way I now ask every student to.

Start your next uneven seam by naming the fabric pair honestly. Stable cotton on cotton rarely needs more than closer pins, while anything slippery, pieced, or striped earns a walking foot.
Anything cut on the bias earns a line of stay stitching first. Keep a walking foot in your accessory box even if you reach for it rarely, since the $15-40 you spend once will outlast a decade of seams you would otherwise unpick and sew again.
Frequently asked questions
Why does the top layer of fabric end up shorter than the bottom after a long seam?
The feed dogs actively grip and pull only the bottom layer, while the top layer moves by friction alone. That friction is never perfect, so the top layer lags a tiny amount on every stitch, and the gap compounds across the length of the seam.
Do I need a walking foot, or will pins and basting handle it?
Pins and hand basting handle most short seams and stable fabrics without any extra cost. Long seams, quilting sandwiches, and slippery pairs like satin or minky feed so much better under a walking foot that the $15-40 tool pays for itself the first project.
What is the difference between a walking foot and a built in dual feed system?
Both drive the top fabric layer with its own set of feed teeth timed to match the feed dogs below. A walking foot clips onto any compatible machine as an accessory, while systems like Pfaff IDT or Janome AcuFeed are built into the machine and engage with a lever.
Why does minky or fleece creep so much worse than quilting cotton?
Minky and fleece are thick with a compressible pile, so the layer in contact with the feed dogs compresses differently than the layer under the presser foot. Pin every 2 inches and add a walking foot for anything longer than a short seam.
Will lowering the presser foot pressure fix uneven feeding on its own?
It helps but rarely solves the problem alone. Dropping the pressure dial two or three numbers reduces drag on the top layer, but pair it with closer pins or a walking foot on long or slippery seams for a reliable fix.

Amit Sisodia
Amit Sisodia is a longtime sewing enthusiast and hobbyist repair tinkerer who has spent years diagnosing tension quirks, jammed bobbins, and stubborn feed dogs across everything from vintage treadle Singers to modern computerized machines. He writes practical, tested guides for BobbinWise so home sewists can spot problems early, tackle safe repairs themselves, and know when it's smarter to call in a technician.